Learn/How-To-Add-Your-Logo-to-Your-Video
By [[User:|]] on
Make sure they know it's your video!
I have been making a lot of videos lately for my new interview site, FounderBuzz, and thought it would be useful to share something it took me time to figure out: how to add your logo to your video. Of course, this is probably simple for people who have done a lot of video editing, but for a complete novice like me, it was surprisingly hard to find good information.
Lots of people are posting video clips on the Web now. It's often easier to explain a product or service in a video, and there's also the chance that your clever video will become immensely popular and draw more people to your website. With that in mind, you certainly want to embed your logo in any video clips you post online.
I used Apple's iMovie video editing software, so some of the instructions below will be specific to that program. Generally, though, these instructions should help even if you're using other video editing software.
Video Editing Equipment
- Computer: iMac running OS X Snow Leopard
- Video editing software: iMovie ’11
- Image editor: Pixelmator, but I have also used Photoshop
Video Editing Process
- Step 1: Generate a PNG of your logo. Get your logo into the proper format. You need a PNG of your logo, not a JPEG, PDF, or other format. You need a PNG because it will show just your logo - the background will be transparent, blocking less of your video image.
- Step 2: Create the logo in the proper aspect ratio. Your logo needs to have the same aspect ratio as your video. This will prevent your logo from being cropped or having black bands appear when the whole logo is shown. I have two versions of my logo: one for widescreen HD video (1,280 x 720) and one in standard (640 x 480) ratio.
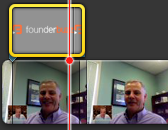
- Step 3: Drag your logo onto your iMovie project. When you do this, you will be presented with options for how to insert this image into your video. Choose Picture in Picture to have it overlaid on the video.
- Step 4: Fit your image to the video. Select your new Picture in Picture image in iMovie and edit it. (In iMovie you can just press “c” once you have it selected.) Once in editing mode, choose “fit” to make sure your entire logo is selected.
- Step 5: Resize your logo and position it. Dragging the corner of your newly inserted logo allows you to make it bigger or smaller within your video. Then you can position it appropriately within the frame.
- Step 6: Expand your logo across your video. I choose to have my logo show up from the beginning of the video to the end, but you can choose to have it show up only in certain sections of the video.
Editing video is fun, but it's a learning process, for sure. Leave a message on my talk page if you have any questions or comments.
For tips on using video to promote your business, read Video Marketing 101. See Scott's video interviews of entrepreneurs at FounderBuzz.


